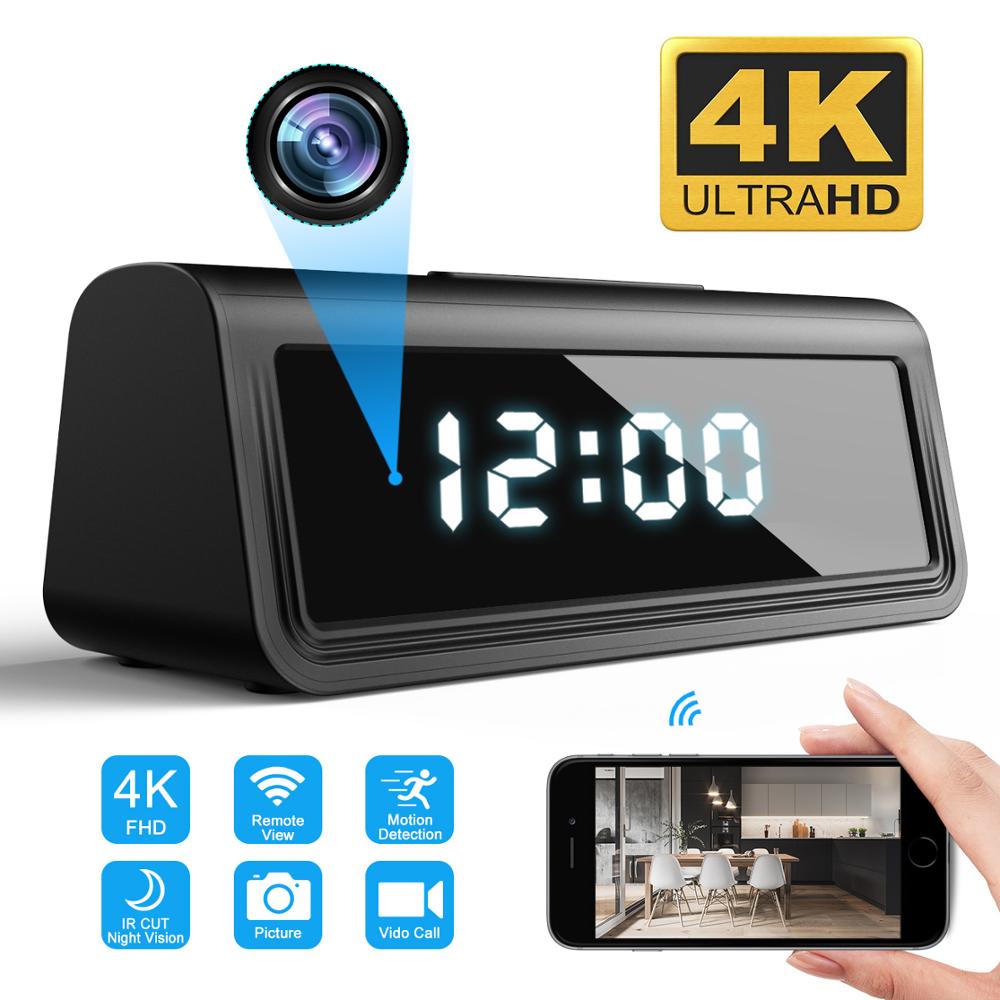
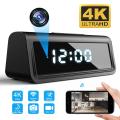
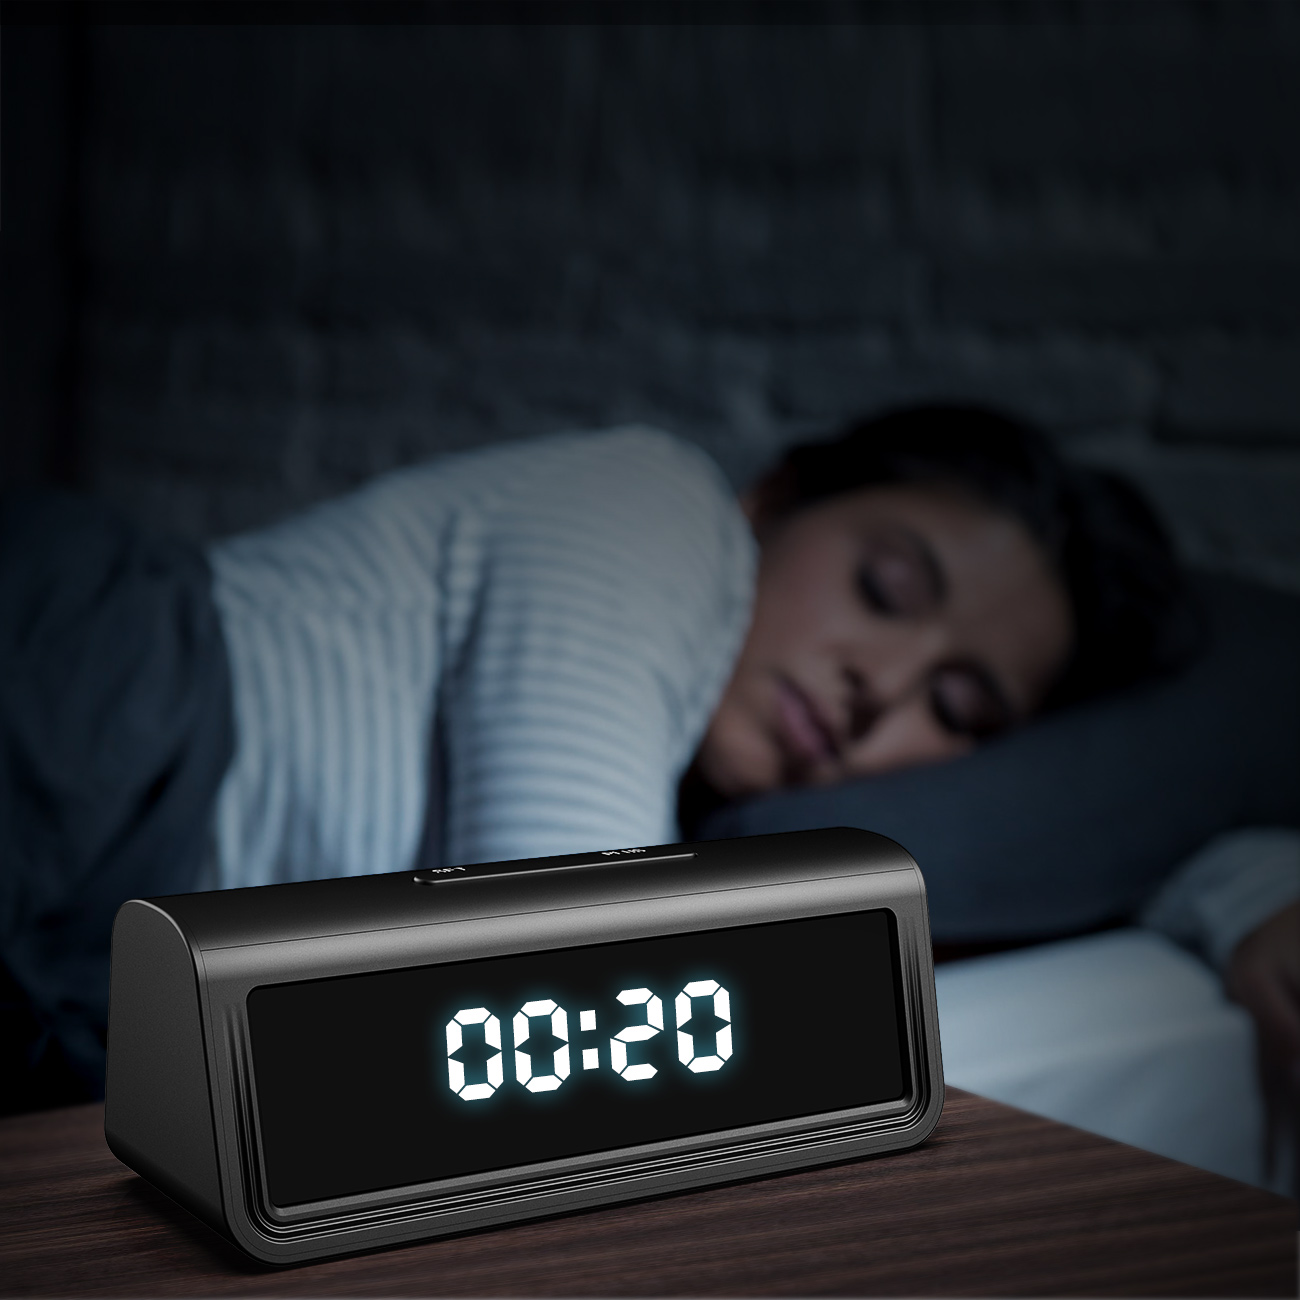
4K Clock Camera Wireless WIFI Micro Cam IR Night View Alarm Camcorder Digital Clock Video Mini Camera DVR Hidden TF Card
Feature:
Table alarm WIFI clock camera
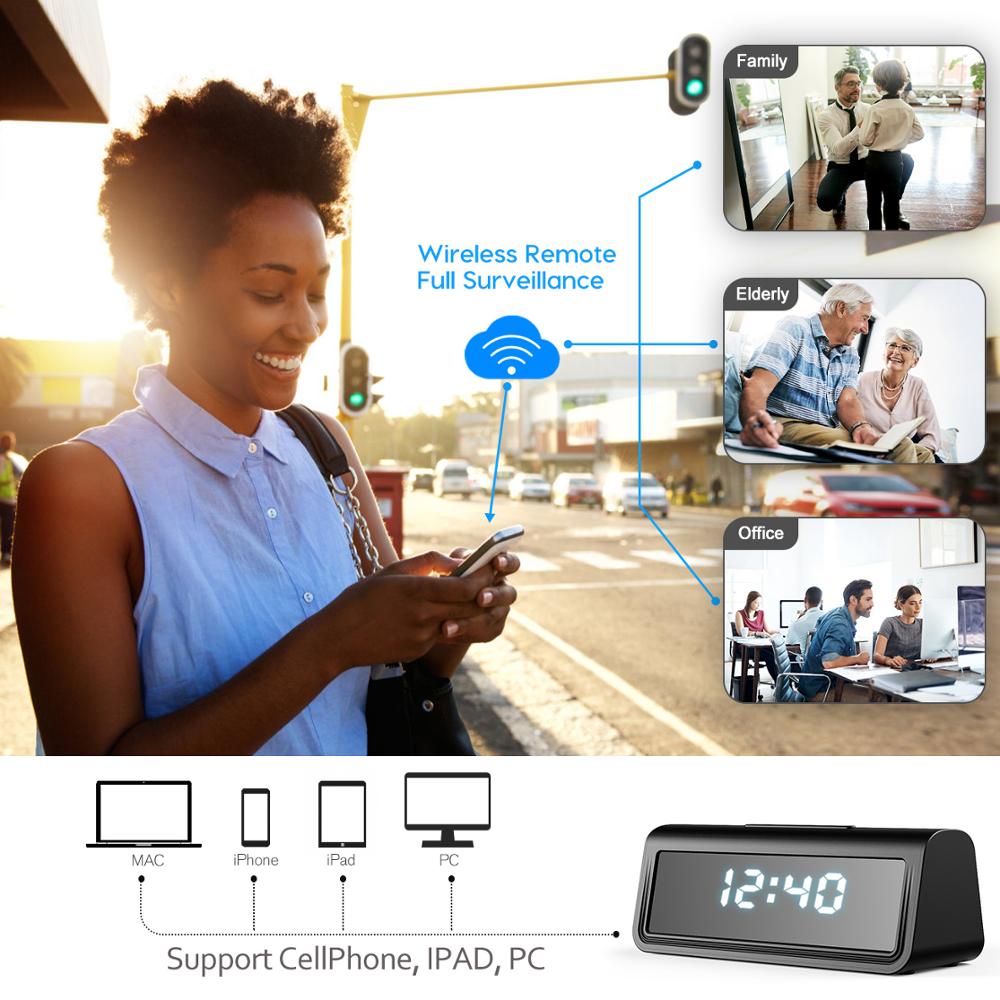
Live-viewing on smart phone
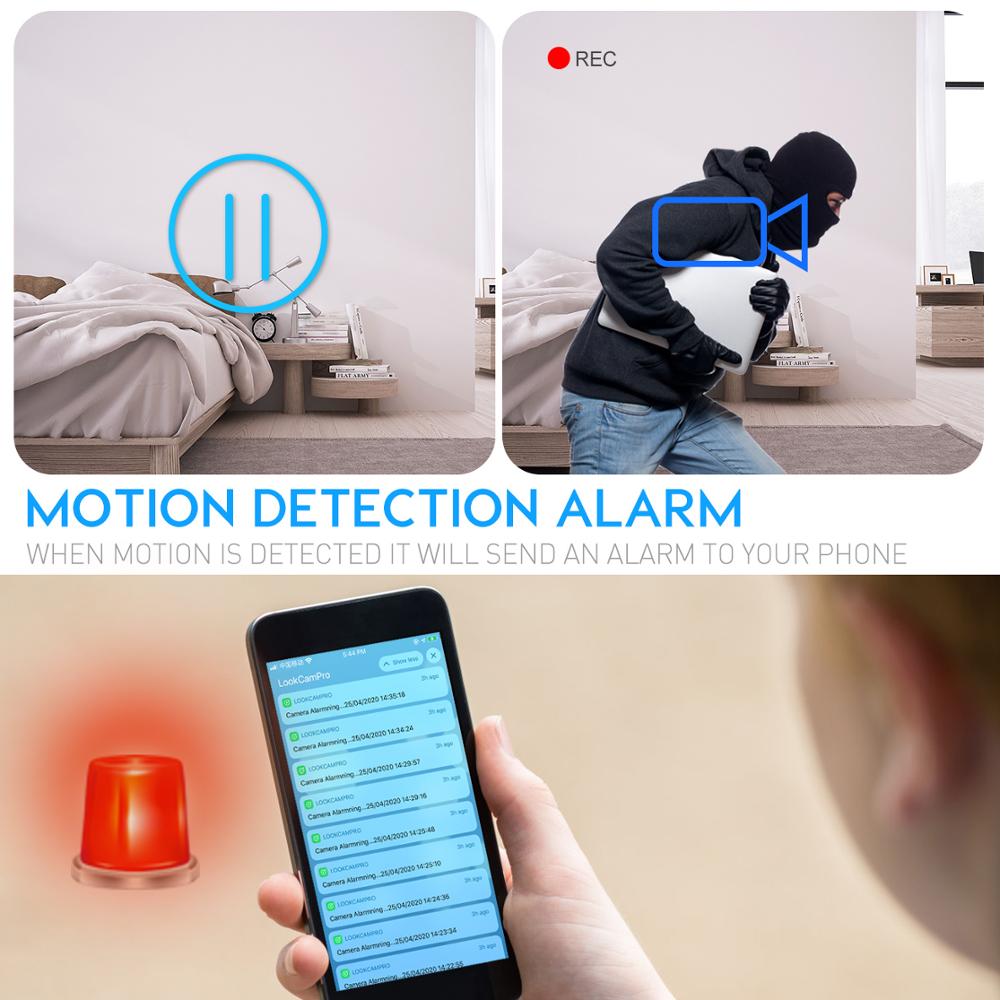
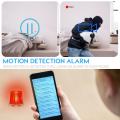
Video recording and motion detction
4K FHD Resolution
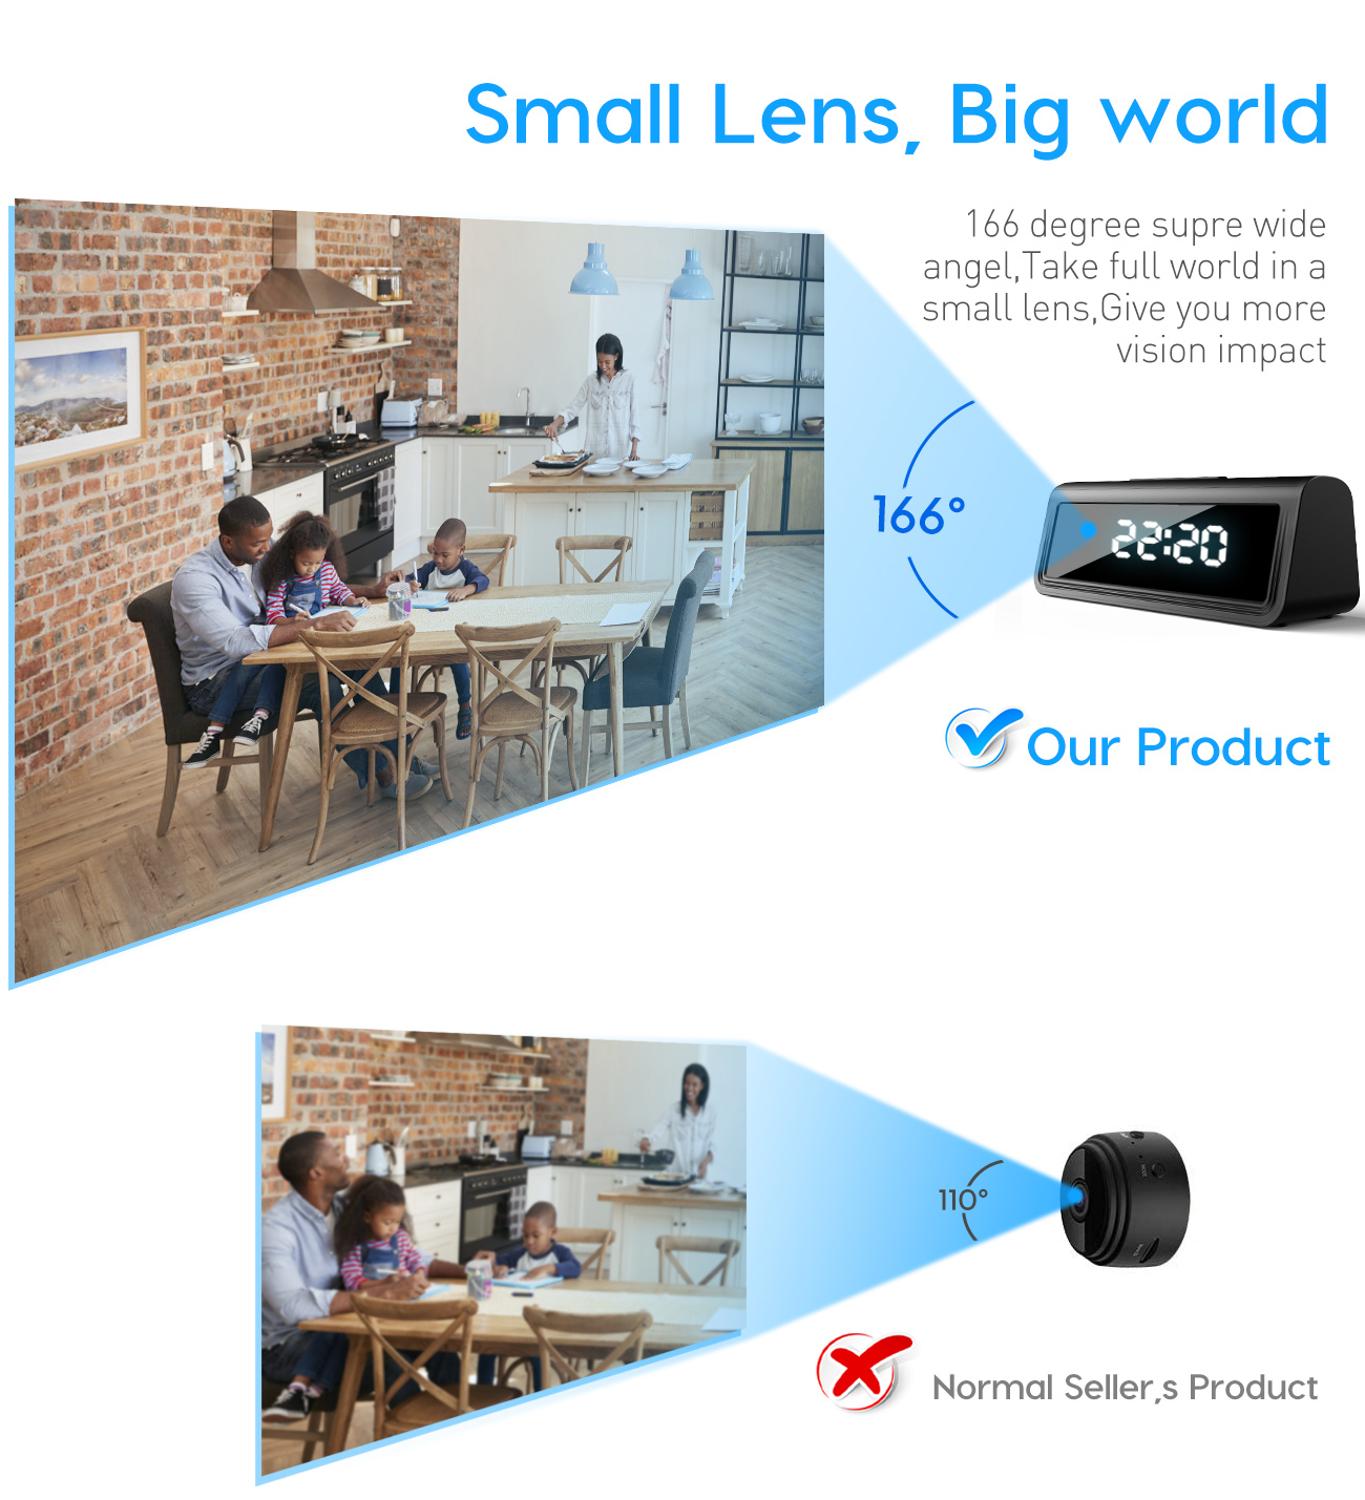
166 degree pinhole len
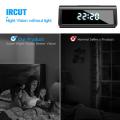
Auto IR night vision camera
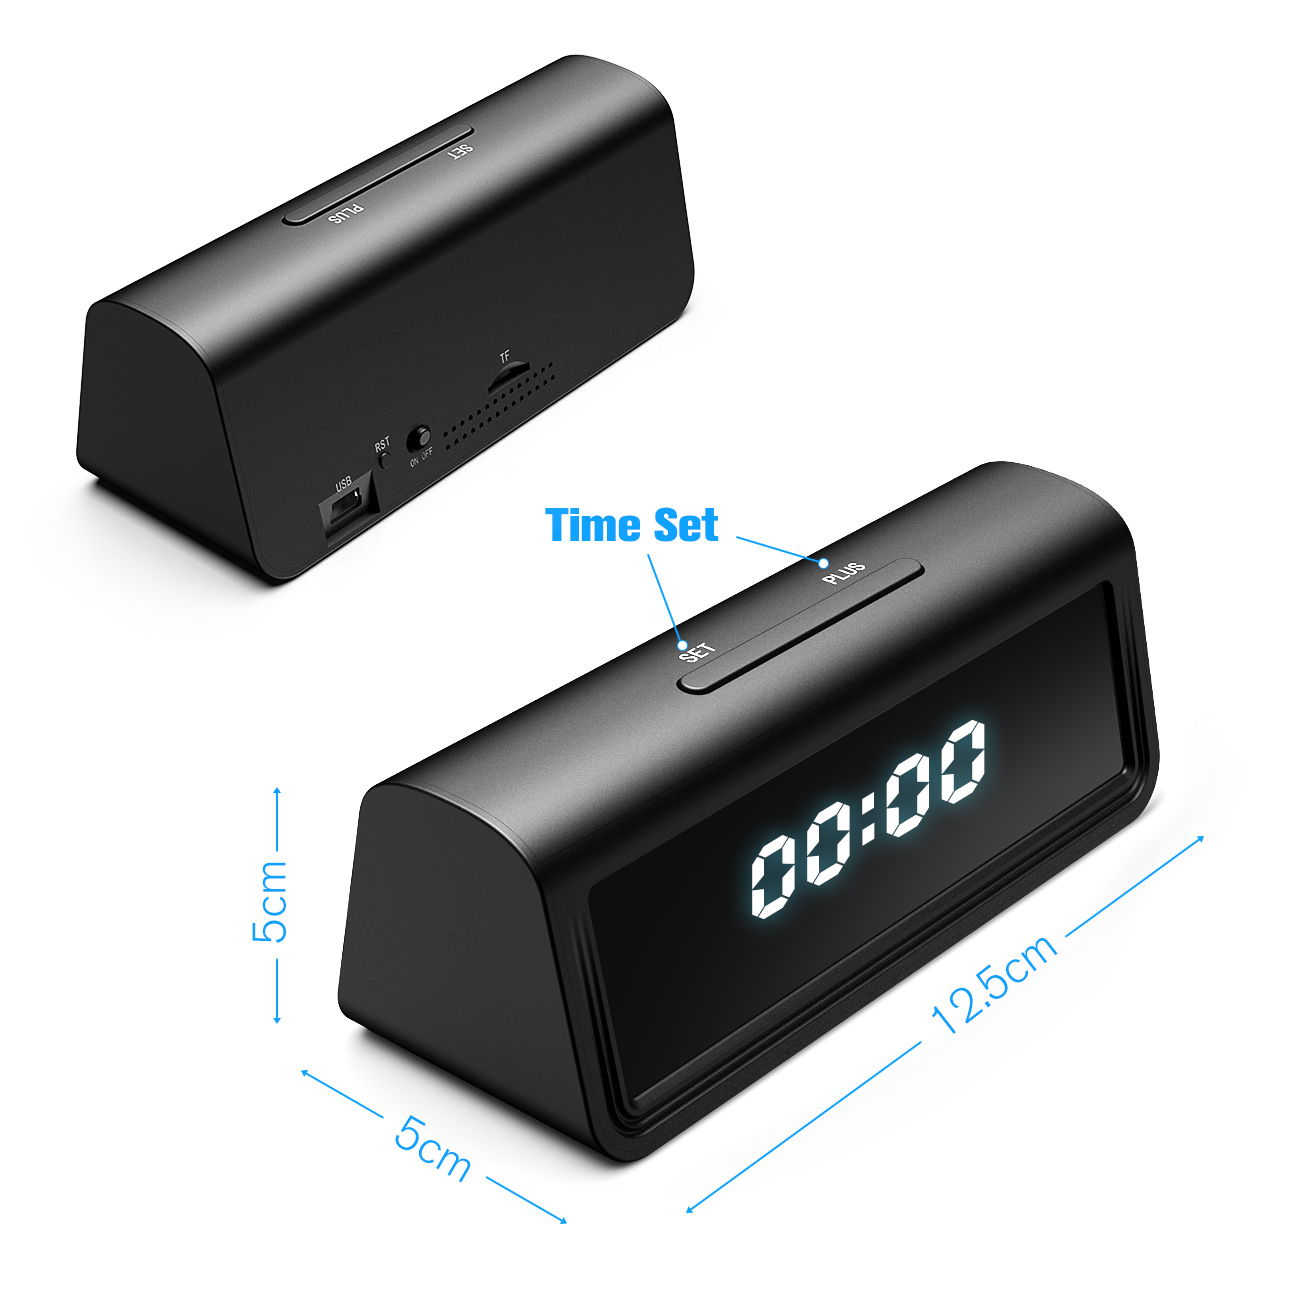
Up to 128GB micro-SD Card
1200mah ,battery life 4 working
7/24 Hours working while charging
USER MANUAL
This manual describes how to use this WIFI camera and install the supplied software. Be sure that you have read and understood its contents before using the camera.
HDlivecam

To get started, you need:
1.A wireless network (only support 2.4G)***Use numbers and letters in creating network name and password.**2.A smart device, such as an Android Smart Phone or Tablet (Android version 6.0 or latest) or an iPhone, iPad, or iPod Touch (IOS version 8.0 or latest).
APP Download:
Download the App “HDlivecam Pro” from Google Play Store (for Android) or Apple Store (for iOS). Or scan the QR code to download the APP.

Quick Start Guide
①Power on Camera②Connect to AP mode③Change AP mode to IP mode④Live Videos
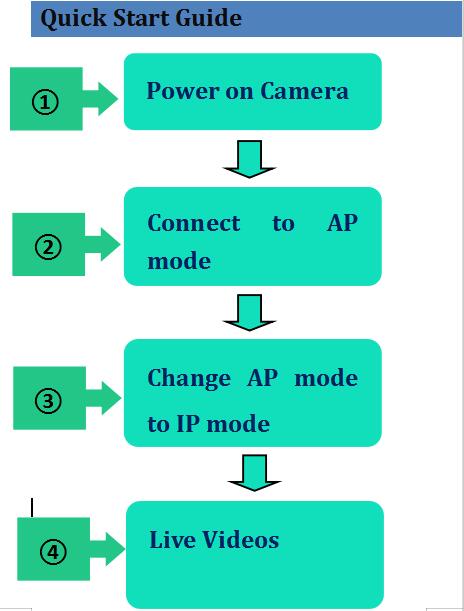
***AP mode for point to point , the camera can not be view remotely . the phone need to be close to the camera to be able to view the live videos. **
Step ① Power on the camera
***Camera configured**Before setting, connecting the device with power supply and turn it on.
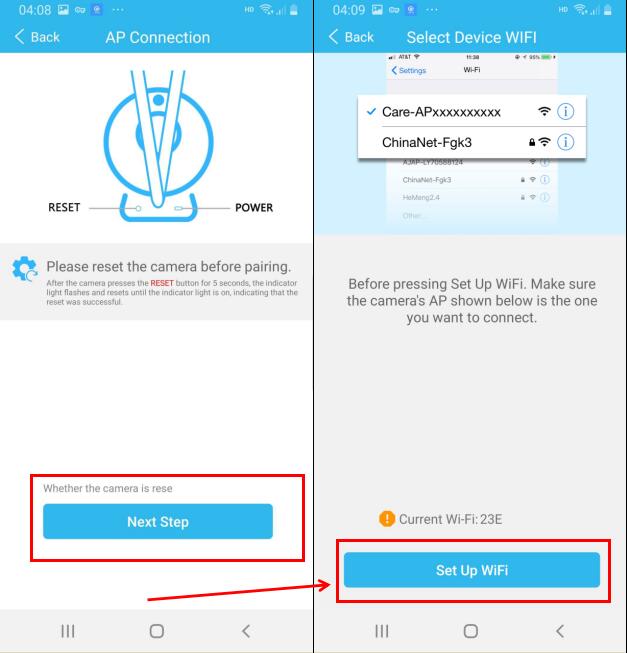
Step ② Connect to AP mode
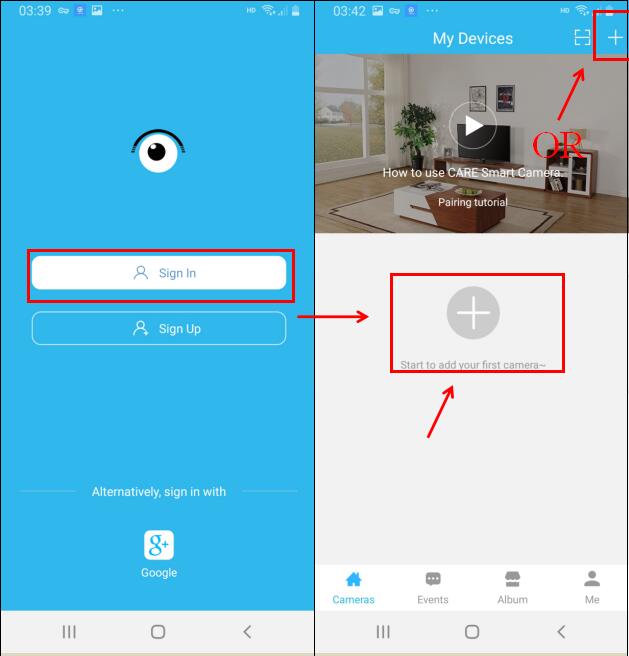
Open the “HDlivecam” App , Sign Up( Register a new account ) if it is your first time to use this APP . Then Sign in(Login in).Click on the “ ” to add a new device.
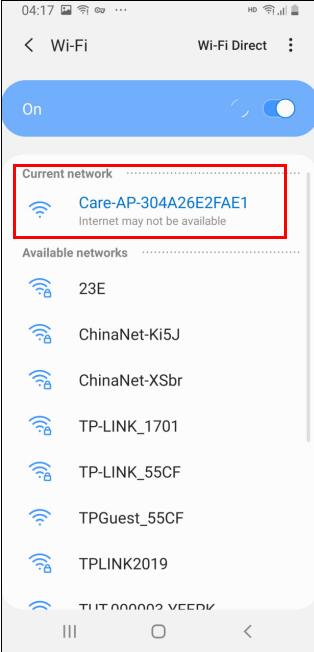
Click “Next Step” and then click “Setup WI-FI” will enter into your phone “WI-FI Setting” . Connect the network same as camera’s UID(which is unique to each unit)
***If there is no hotspot WIFI please reset the camera and wait the camera reboot**
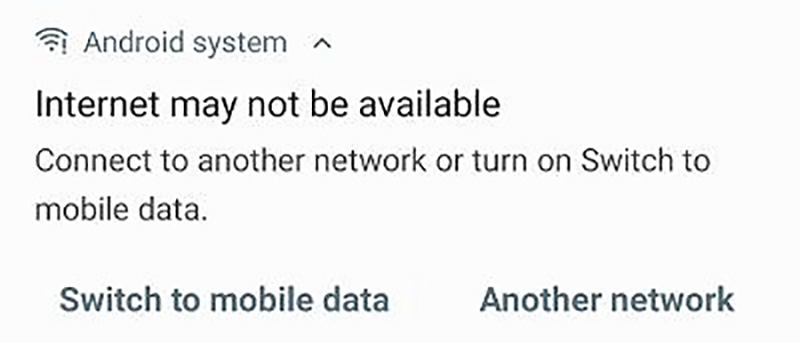
***If your Android system phone show you that “the current WLAN network cannot access the internet , Switch to another network ?” Just ignore it.**
Back to HDlivecam APP after connection is successful.
Now you are in AP mode .***AP mode for point to point , the camera can not be view remotely . the phone need to be close to the camera to be able to view the live videos. **
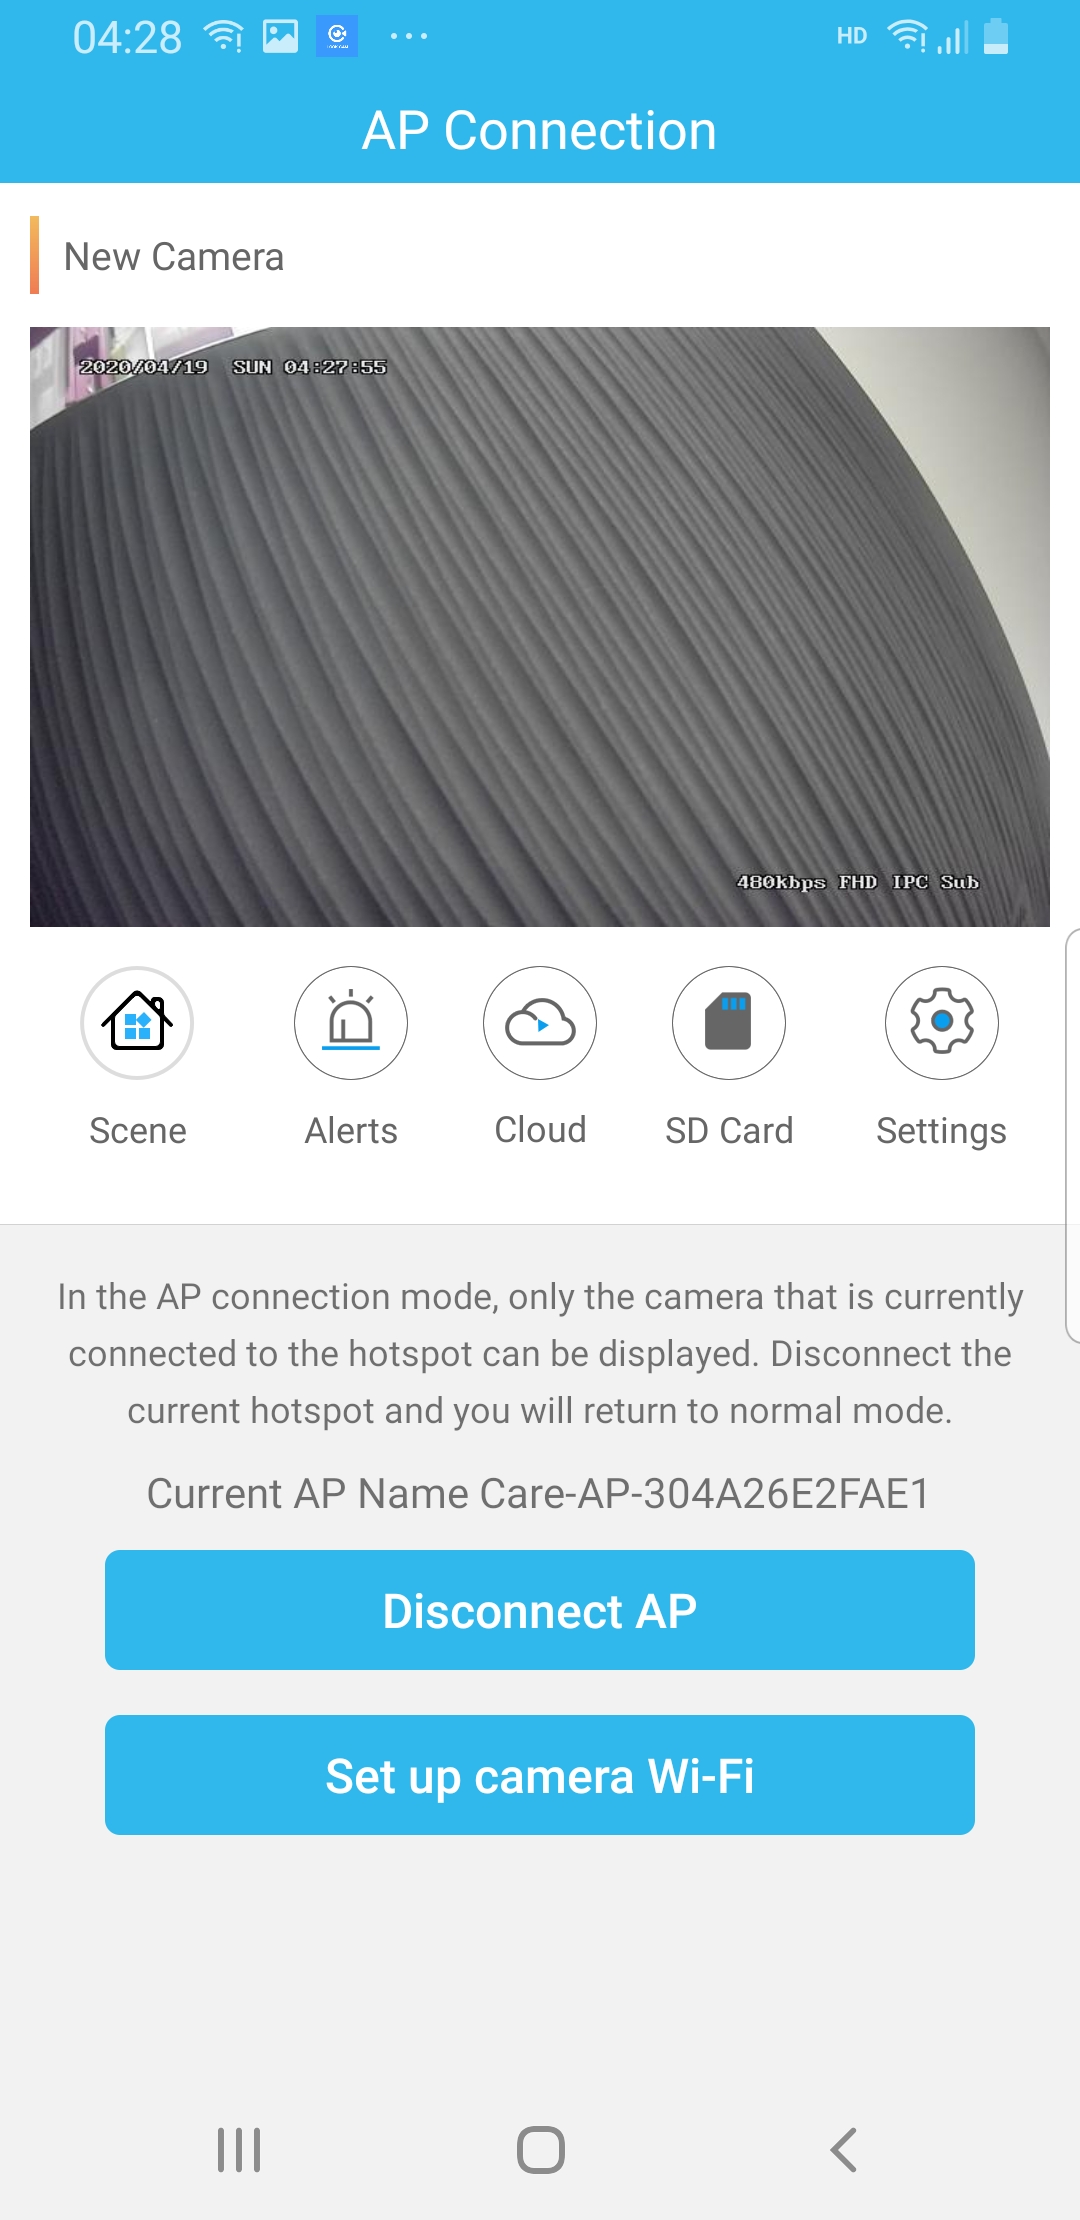
Step ③ Change AP to IP mode
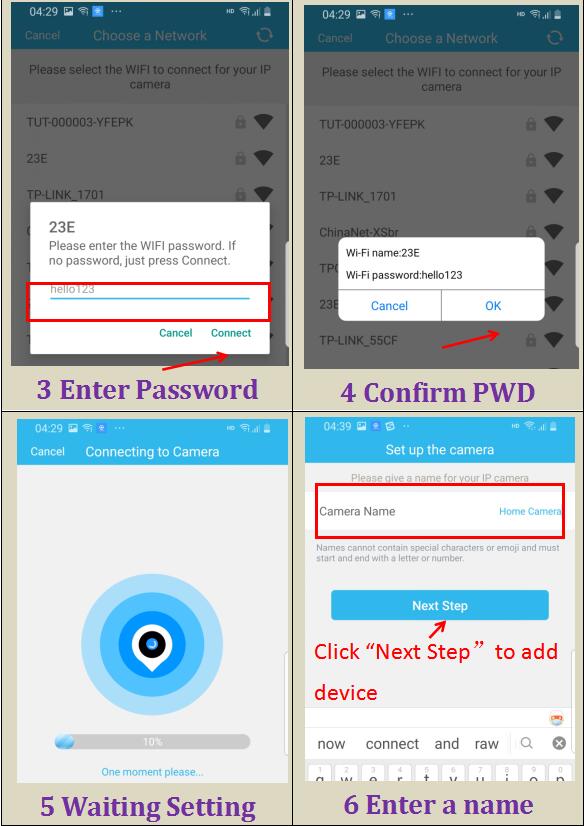
Click the “ Set up camera WI-FI ” to connect the camera to IP Mode 1 Set up WI-FI2 Select WI-FI3 Enter Password4 Confirm PWD5 Waiting Setting6 Enter a nameClick “Next Step”to add device

Step ④ Live Videos
Click the image to view the live video 7 Add Successful8 Live Videos

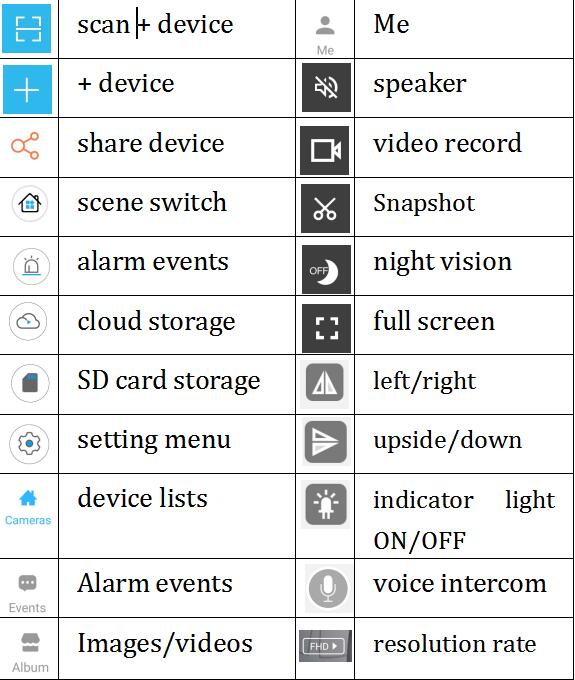
Icon Details:
scan device deviceshare devicescene switchalarm eventscloud storageSD card storagesetting menudevice listsAlarm eventsImages/videosMespeakervideo recordSnapshotnight visionfull screenleft/rightupside/downindicator light ON/OFFvoice intercomresolution rate
FREQUENTLY ASKED QUESTIONS
What Micro SD Card is required for recording?
The camera supports up to 128 GB Micro SD card. Please use High Speed Class 10 FAT formatted memory card. You must format the Micro SD before using.
Why can’t the camera go online?
1. Powerless;
2. Check if your router is working properly or not;
3. Weak Wi-Fi signal;
4. Wrong password wrong while Wi-Fi setting
Why is remote monitoring not smooth?
You should choose a suitable resolution to watch according to your internet speed.
How could i save in SD card?
Open the setting menu to set the SD card video recording.
Why i can’t save to my SD card?
SD Card must be formatted if this is your first time to use it .
How do I when I forgot my password?
Press reset key for 10 seconds and restore the factory setting.
Disclaimer:
Our company would not be responsible to any consequences cause by improper use, please use it in appoint environment and comply with the relevant laws and regulations!